Saturday, July 16, 2011

Jadin's New old dresser


This dresser has seen many years.  I remember my parents bought it for me when I was about 11.  It was a light pine and my Mom lovingly stenciled cats and hearts on it.  We toted it around since then and when we moved into our house I decided it was time to re-vamp it for Jadin's room.  I added molding to the fronts of the drawers for depth and to make it look a little more expensive and I added wainscoat and molding to both sides.  I painted it gloss white and added white wooden knobs to make it look a little chunky.  It turned out really cute.  


That was 4 years ago and Jadin's not 7 anymore.  Wahhhhhh!  Moving on.  She's 11 1/2 and is ready for a little bit more of a grown-up tween look in her room.  We're toying with turquoise and green.  I decided to re-decorate one element at a time and tackled her dresser first.  After thinking through several options I decided to incorporate Jadin's absolute favorite cartoon characters, Calvin and Hobbes.  I scanned some of her favorite cartoon strips and used Photoshop to put them onto a notebook paper texture.  I added some cute little sayings in pinks, greens and turquoise to make it look as if Jadin had made her own commentary with a sharpie on her dresser.  Then I printed the doctored cartoons out in 4" strips and decoupaged them in the empty space of the molding.  We found some really great black matte metal oblong knobs on ebay and voila.....brand spanking new, old dresser!


Close-up of Mock sharpie commentary

Friday, July 15, 2011

School Days Picture Frames

I love the idea of displaying my kid's school year pictures so I can see the progression and the changes in their cute, little faces.  I hope I don't offend anyone by saying this but I hate the options out there for doing this.  The little yellow, schoolbus picture frames just don't do it for me.  When I come up against decorative obstacles I always say the same thing.....I'll make my own!  


So, I bought some boards and cut them into 16" x 33" rectangles.  I figured out where I wanted my photos to go and enlisted my Dad (once again) to cut them out for me and rout them on the back so I could fit a piece of glass and cardboard in place.  Next, I had to come up with the glass. Don't buy DIY glass cutters.  They don't work!  Instead, I went to my local Lowe's and found my favorite employee who recognizes me every time I come in.  He was so great and cut 28 pieces of 3 1/2" x 5" glass for me.  I secured the glass and cardboard on the back with some black photo turns that I screwed into the wood.  I painted the frames off-white and when they were dry I dry-brushed the edges and corners with dark brown paint to make them look worn with time.  I found my metal label plates online for much cheaper than a craft store so I could label each year and I liked the little touch of metal.  I think it took it up a notch.  I really love the way they turned out and look forward to adding my new photos every year.


Up close of Jack's pre-school slot

Kitchen & Dining Area After

The first picture seen here is the kitchen before we grouted the tile.  I had already painted my cabinets here but hadn't added the glaze.
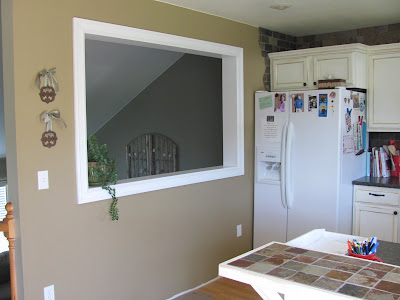


New window

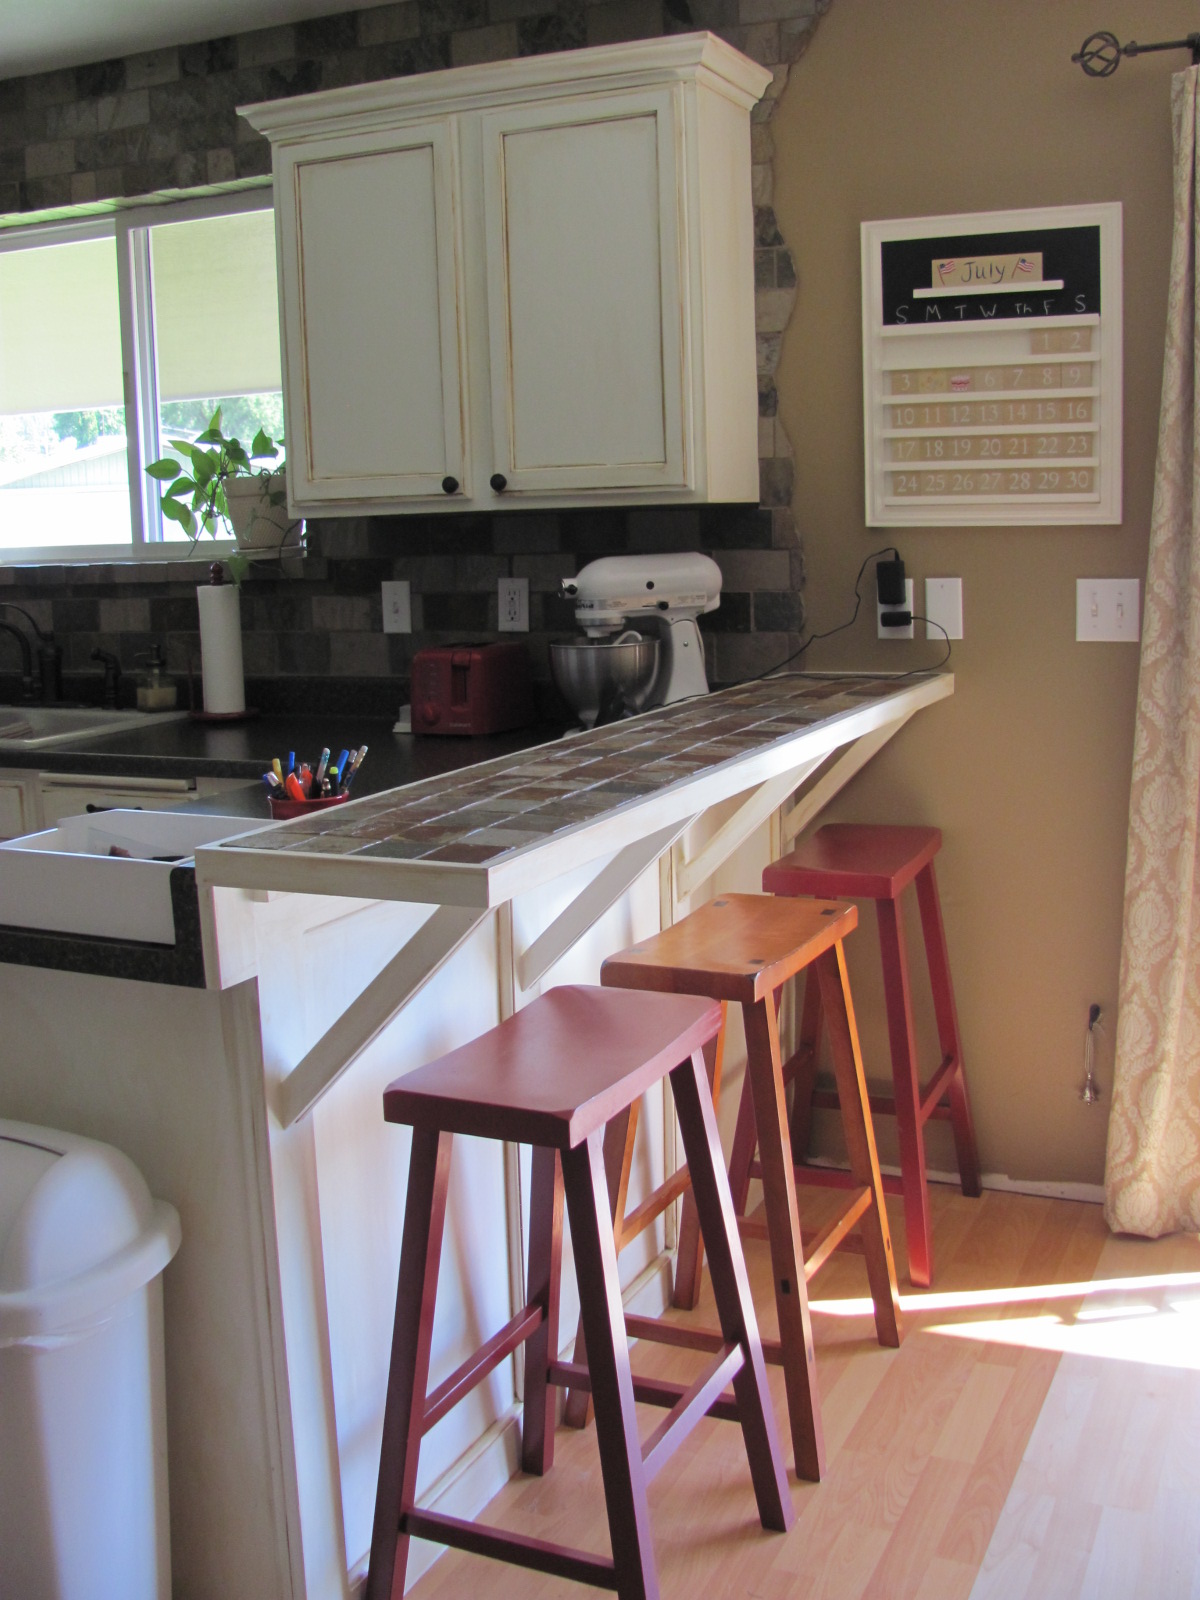
Completed cabinets, new knobs, wall and counters
Custom tiled bar area built by my
amazing Dad!


New light fixture, wall paint, decor


I found this amazing mirror and had to have it.  I flanked it with two farm inspired hook shelves that I built
and painted red and distressed.  I hung herbs to dry and some wooden utensils that my family
brought home with us on the mission field in Austria.  

Kitchen & Dining Area Before

As you can see in the before pictures, the previous owners had a deep-rooted but unwarranted love of molding.  If you look closely at the ceiling they had attached braided molding in a rectangle on the ceiling.  To add insult to injury....they then painted the center a mint green.  Gag.  When we pulled the molding down we found that they used a ton of brads and glue to adhere it so that it took the drywall with it.  
Before....note the molding on the ceiling


Paul had a brilliant idea the first few weeks after we moved in and suggested that we put a large window on the wall that separated the living room from the kitchen.  I was pretty nervous about this project but he did a fantastic job and it looks so much more open and lets a lot more light into the living room.  


wall without window


The other elements about the kitchen that I wanted to change were the cabinets (oak with outdated gold knobs), countertop (previous owners had tiled over old laminate counter), the walls (painted peach and no tile work) and the floor which we will get to one of these days.
Oak, gold knobs and tile


I knew I wanted a really cozy, classy kitchen because we spend a lot of time in the kitchen and at the table, especially when we have company.  I wanted kind of an updated French country feel and I knew one of the ways I wanted to achieve this was to brick the entire wall from counter to ceiling behind the cabinets.  Only problem...I wasn't crazy about the color of the bricks we were finding so my brother Luke gave me the idea to cut slate into 3" x 6" brick tile and use that to "brick" my wall.  I love it!!!!!  


I had to drape the entire kitchen so I could repair the ceiling.  This was probably
the hardest thing we did in the kitchen.

Thursday, July 7, 2011

Jack's room


7.7.11 - We were living in Alaska when we bought our house sight unseen.  Our realtor (who's actually a very good friend) tried to talk us out of it because there was so much work to do.  There were some really strange touches in the house,  like molding glued to the ceiling and a giant hot tub with a water heater too small to fill it.  We really liked the neighborhood and the amount of land the house sat on so we persisted and bought it.  Since then we've systematically made our way through the house updating and remodeling as we went.  One of the first rooms we completely revamped was Jack's room.  I'm bummed because I went searching for a "before" picture of his room but couldn't find one.  It was a lavender color with splattered white paint on all the walls and then the previous owners had glued white finial type decorations EVERYWHERE.  We likened it to cake frosting.  Anyhow, after alot of scraping, texturing and painting...here are some photos of the finished project.  (4 years ago)